Turn screen recordings into step-by-step documentation
Record a software workflow, then generate a written guide with screenshots. Review the instructions, adjust the images and export an article your team can use alongside the video tutorial.
See the written guide alongside the recording
This example shows how a recorded workflow can become illustrated instructions. Check that the screenshots and wording explain the task clearly before sharing your own guide.
Created from a recorded workflow
AI-written intro. Sets context automatically.
Screenshots chosen from the recording.
Bold action words. Consistent tone throughout.
Callout blocks for important details.
Section headings structure the guide.
How to Filter Out Internal Traffic in Google Analytics
This guide will walk you through the step-by-step process of identifying internal traffic, creating rules to define it, and setting up filters to exclude it from your reports within Google Analytics. By following these steps, you can trust your data and gain genuine insight into your users' behavior.
Defining an Internal Traffic Rule
- 1
Click Admin in the lower-left corner of Google Analytics.
- 2
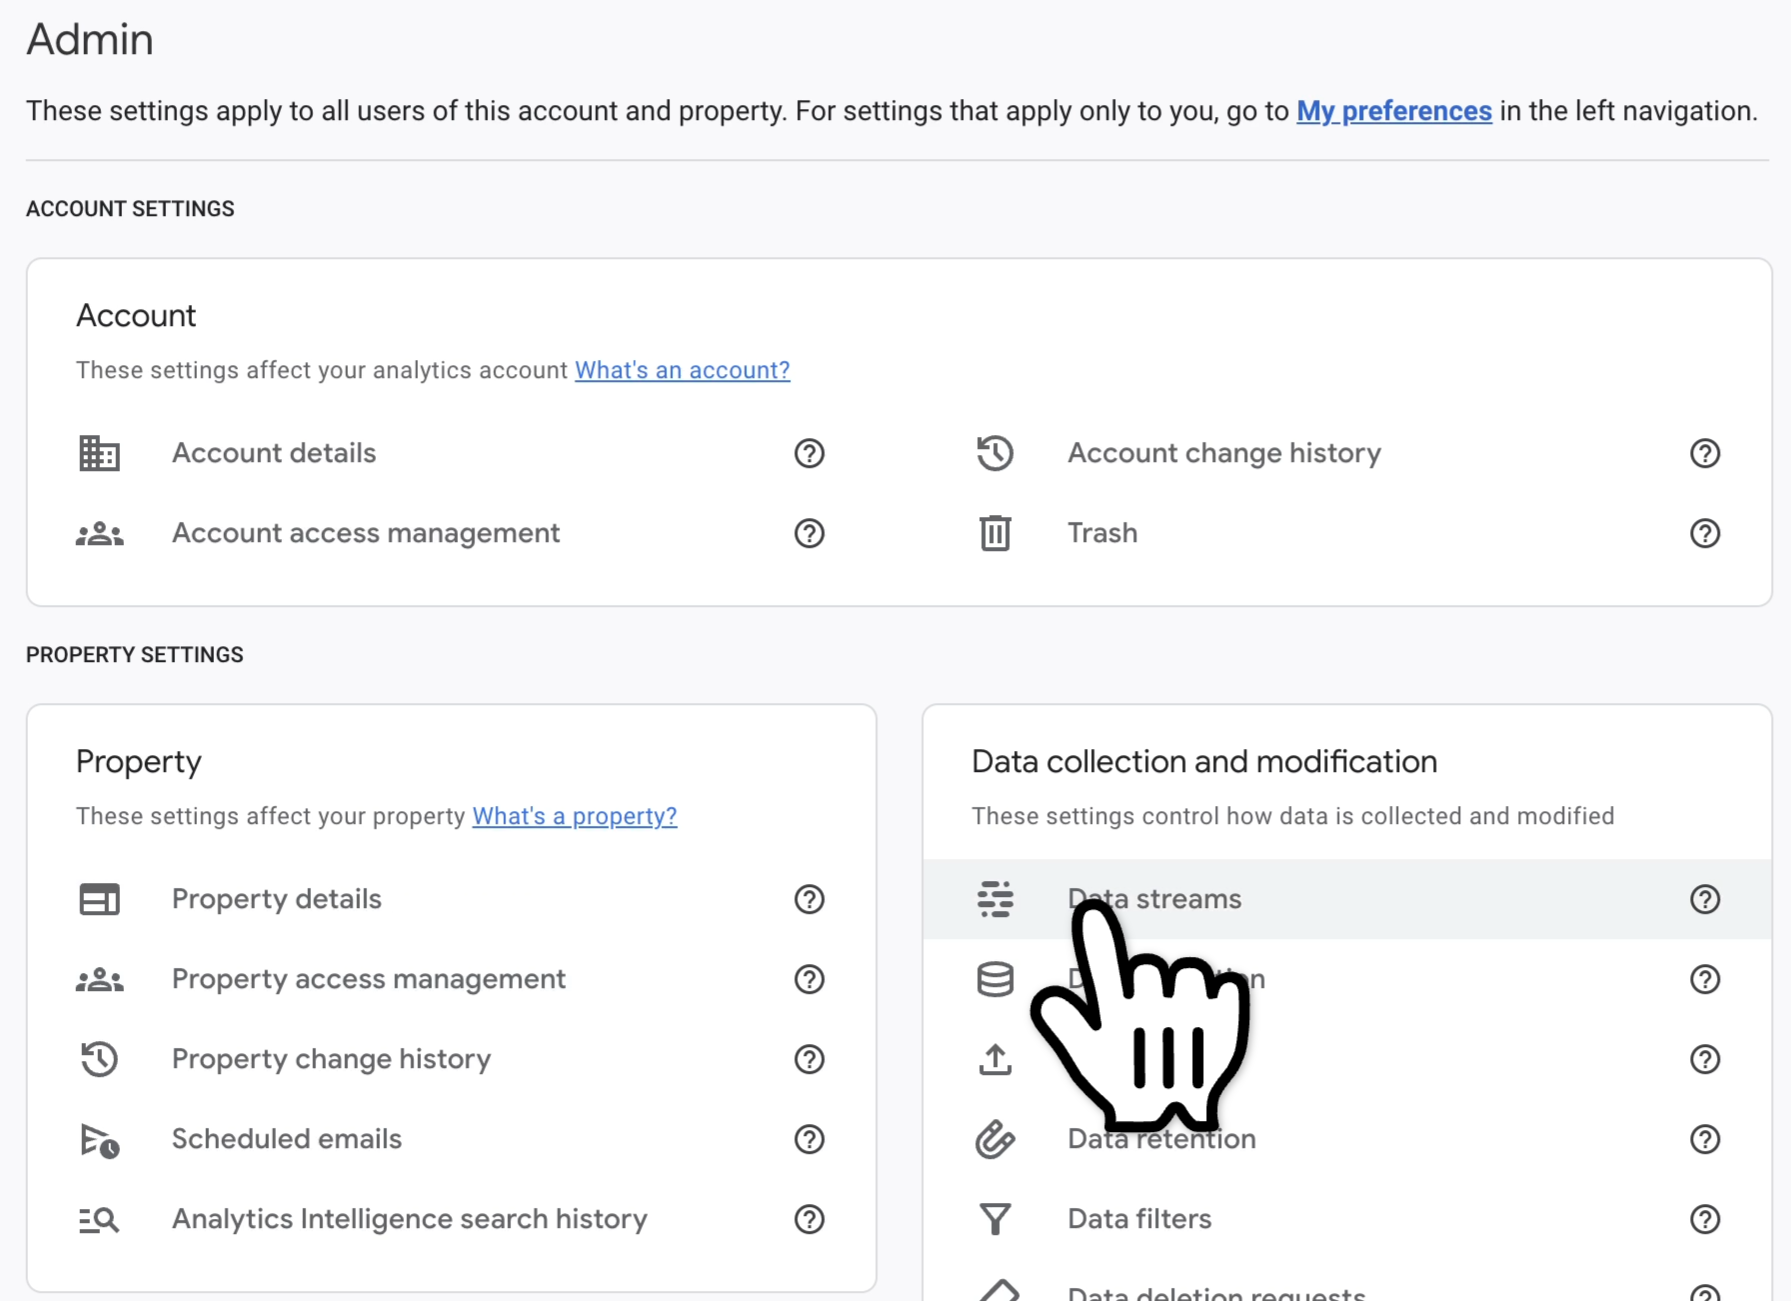
Click Data Streams.
- 3
Select the data stream you want to configure (for example, your website property).
- 4
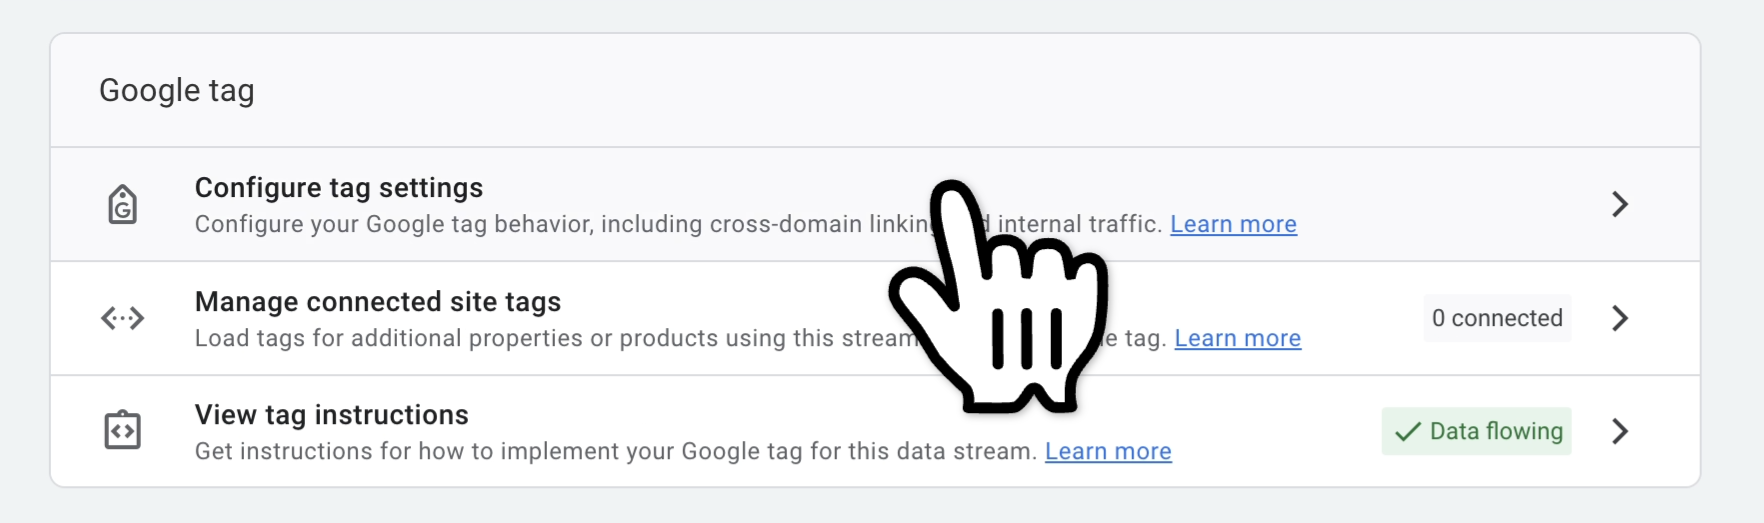
Click Configure tag settings.
- 5
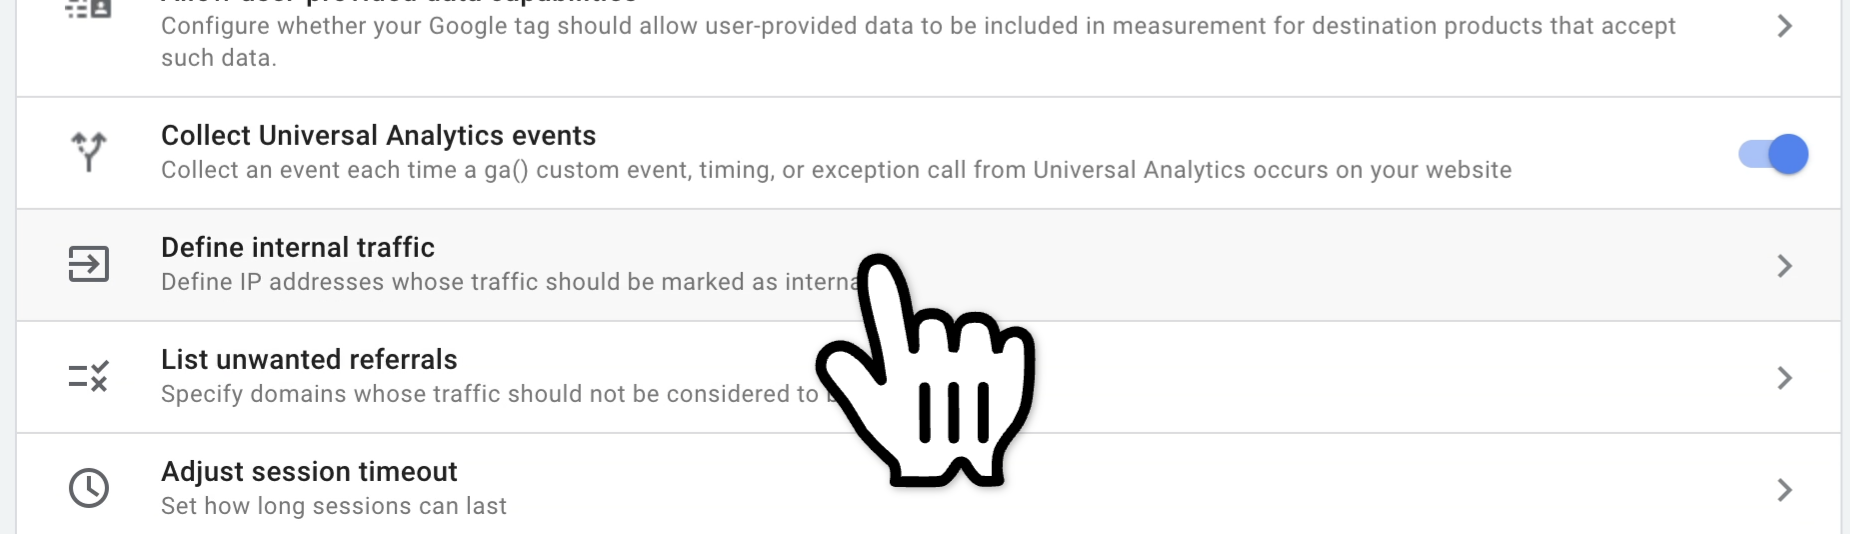
Click Show more to reveal additional settings.
- 6
Click Define internal traffic.
- 7
Click Create to begin making a new rule.
- 8
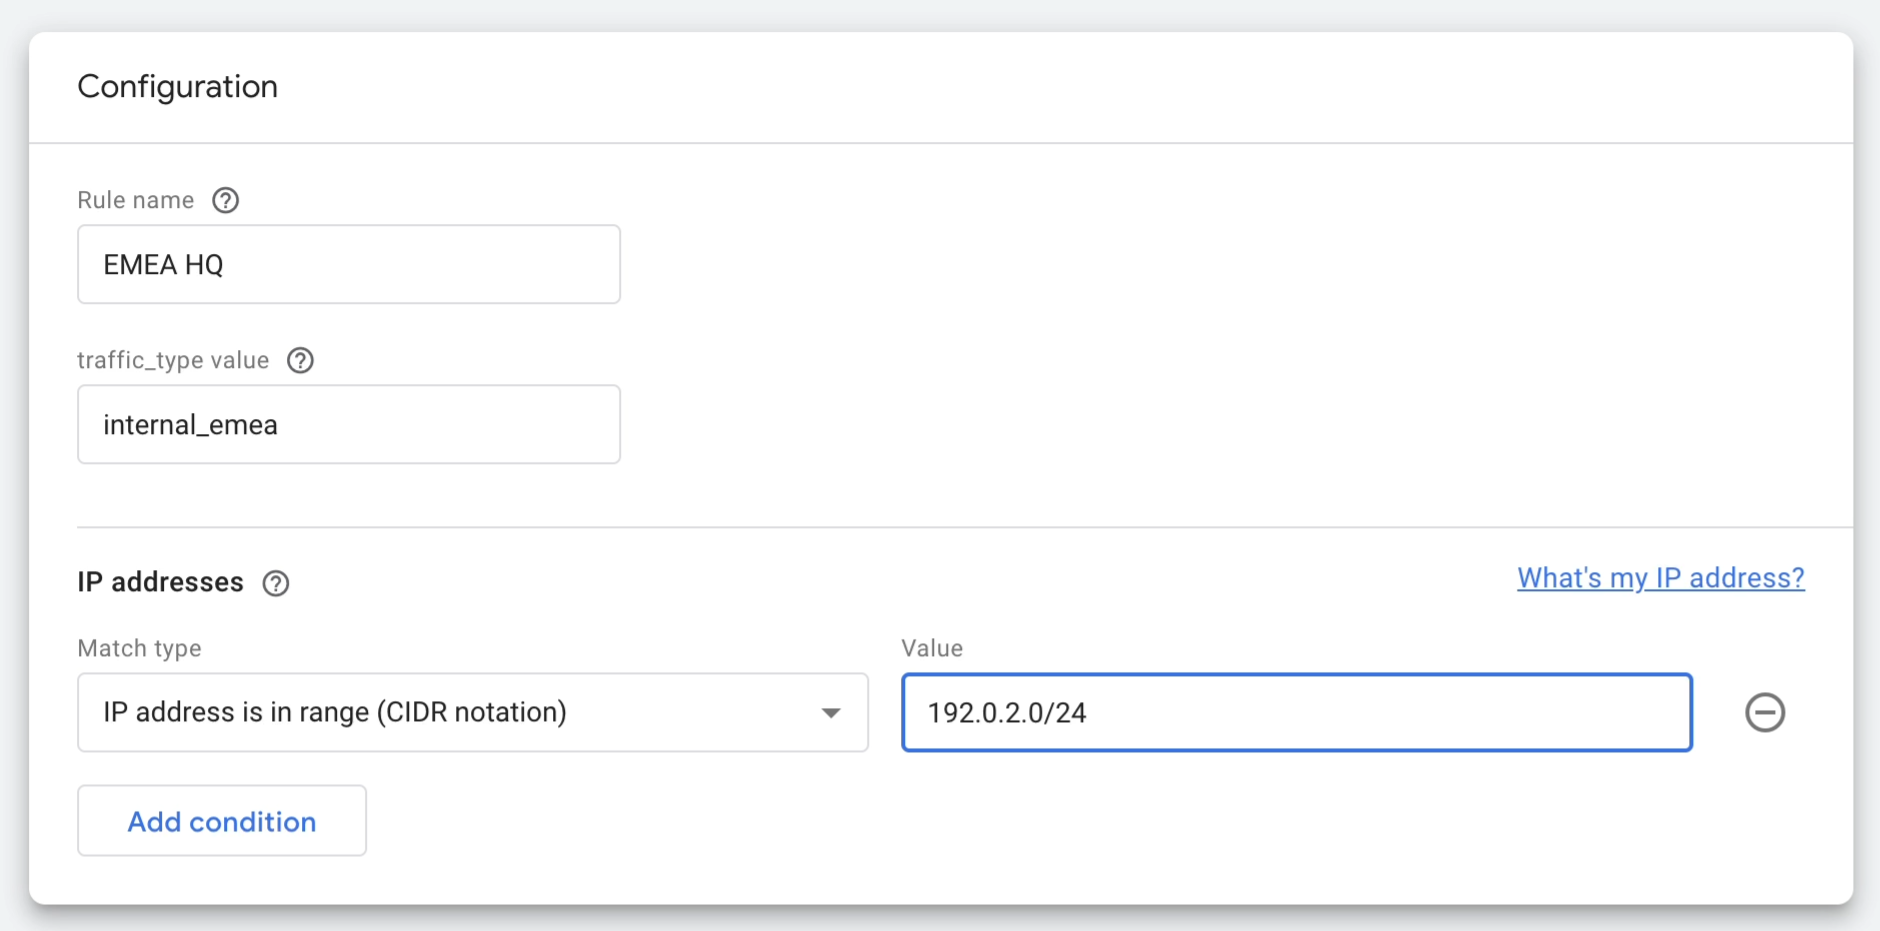
Enter a unique name for your internal traffic rule. This will help you identify it when creating your filter later on.
Enter a descriptive value for the traffic_type parameter. This value will be used to match your filter.
- 9
Input the IP address or IP address range that represents your internal traffic.
- 10
Once all information has been entered and verified, click Create to finalize your internal traffic rule.
Creating a Data Filter for Internal Traffic
- 1
Click Admin from the Google Analytics dashboard.
- 2
Click Data filters.
- 3
Click Create filter.
- 4
In the filter options, select Internal traffic.
How to turn a screen recording into documentation
- Capture one task.
Record the workflow you want to explain, using a demo account and safe sample data. Keep the recording focused on a clear outcome.
- Generate the article.
Open your video project, switch to the Document tab and choose Generate Documentation. Tutorial AI organizes the recording and narration into written instructions.
- Review the details.
Edit the text and headings. Use the Screenshot Selector to choose frames, and crop images so readers can see the relevant controls. Check the order of the steps and remove information that should not be shared.
- Export the guide.
Choose RTF, Markdown or HTML, then check the result in the destination tool. You can also use the narrated video when a moving demonstration makes a step easier to follow.
Need a narrated walkthrough as well? Explore the software tutorial maker.
Frequently asked questions
Can I change the screenshots and written steps?
Yes. Edit the article in Tutorial AI, choose frames with the Screenshot Selector and crop the images to focus on the relevant part of the workflow.
Which documentation formats can I export?
Tutorial AI supports RTF, Markdown and HTML. Review the exported guide in your word processor, knowledge base or CMS before publishing.
From recording to written guide
Generate written instructions from a recorded workflow, then review the details.
Powered by AI
Generate the article with AI, then edit the text and headings.
Choose screenshots from your recording
Use the Screenshot Selector to choose frames and crop images to focus on the relevant controls.
Collaborate with your team
Invite team members to view, edit, and comment on guides before publishing.
Export your content
Choose RTF, Markdown or HTML, then check the result in the destination tool.
Translate into 74 languages
Review the translated text before sharing the guide with your audience.
Start with one process your team repeats
Choose a support answer, onboarding task or internal software workflow. Capture it once, review the article and share the format your readers need.
Create your first guide