You’re probably here because you know how to braid, but you also know most braid tutorials aren’t built to teach. They’re built to document. Someone props up a phone, records a fast pass of their hands, talks while they work, and uploads the result. The style may be excellent. The instruction usually isn’t.
That gap matters. Tutorial braids aren’t just about showing a finished look. They’re about turning a physical skill into a repeatable teaching asset: a clean video, a readable article, and a format you can reuse for client education, classes, product demos, onboarding, internal training, and even help-center style content for your team.
Braiding has always carried meaning beyond appearance. Hair braiding originated in ancient Africa over 5,000 years ago, with the earliest known depiction dated to 3500 BCE. The practice served as a complex communication system where a glance could distinguish tribal affiliation, marital status, or age, demonstrating its deep cultural significance (Odele Beauty on the history of hair braiding). If you teach braiding today, you’re not making disposable content. You’re documenting technique, structure, and cultural craft in a form other people can learn from.
Why Most Braid Tutorials Fail Their Audience
Halfway through a typical braid video, the viewer is already behind. The camera angle hides the fingers. The stylist skips the part where tension changes. The narration wanders. Then the most important moment happens off-frame, too fast to study.
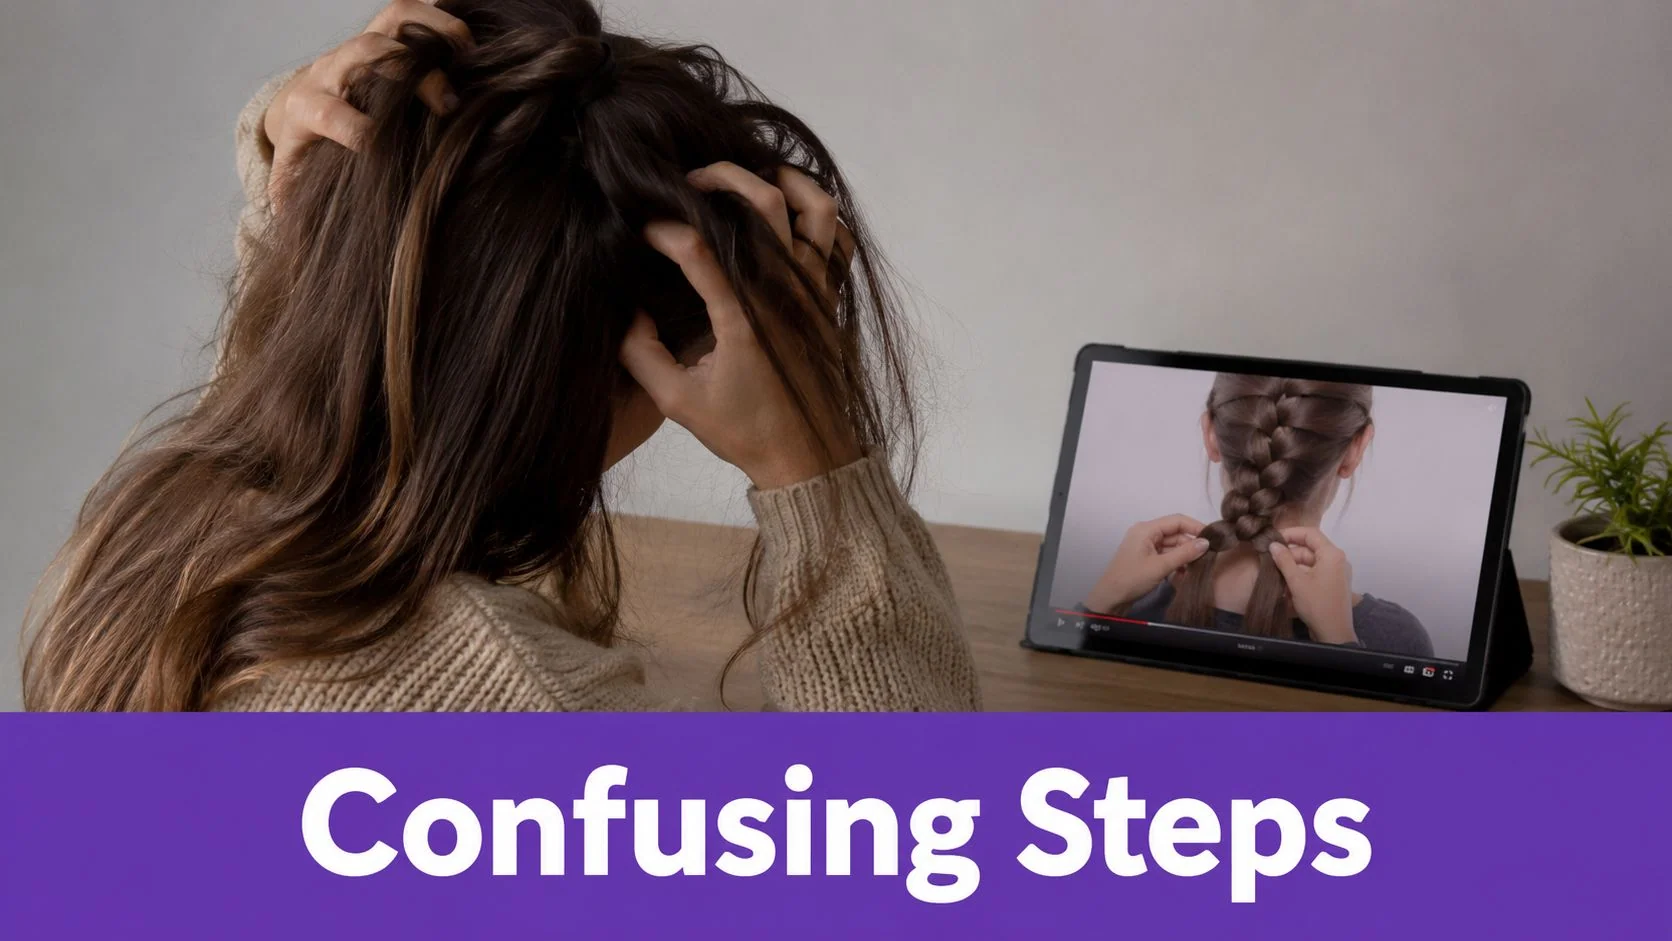
That’s the core problem. Knowing how to produce clean feed-in braids, cornrows, knotless braids, or a neat basic three-strand braid doesn’t automatically make someone good at teaching them. Teaching is its own craft. A viewer needs sequencing, framing, repetition at the right moment, and narration that answers the question they’re about to ask.
Skill is not the same as instruction
A strong braider works from feel. A learner can’t. They need visible checkpoints.
If the tutorial says “just add the hair here,” but doesn’t show how much hair, where the fingers move, or what tension should feel like, the learner has no way to recover. They pause, rewind, and still don’t know what changed.
Practical rule: If a learner has to guess where your fingers went, the tutorial failed before the braid did.
This is why the best educators slow down around decision points, not around the easy parts. They don’t spend extra time introducing products while rushing through the actual transition from natural hair to extension hair.
The most common failure points
A weak braid tutorial usually breaks down in a few predictable ways:
- Unclear framing means the viewer sees the top of the head, but not the hand position that creates the result.
- Poor pacing means simple setup gets too much time while the technical move gets almost none.
- Casual narration sounds friendly, but often leaves out exact instruction.
- No learner support means there’s no written reference for anyone who wants to review steps after the video ends.
For stylists, better teaching also supports the business side of the work. Clear educational content can strengthen retention between appointments, improve trust, and support service follow-through. The same principles behind good tutorials also show up in practical resources on boosting client loyalty in salons, especially when clients feel informed instead of confused.
Different learners also process demonstrations differently. Some need to watch. Some need to read. Some need both. That’s why it helps to design the lesson around how adults absorb practical instruction, not just around what the stylist wants to show. This overview of adult learning styles is useful because it explains why one fast video rarely serves every learner well.
Planning Your Braid Tutorial for Clarity
A clean tutorial starts before the camera turns on. If you improvise the structure, the recording usually wanders. If you pre-build the lesson, the braid becomes easier to teach and easier to repurpose.
Script the braid in decision points
Don’t script every sentence like a commercial. Script the moments where the learner will lose track.
For a braid tutorial, that usually means writing out:
- the starting section size
- how the hair is divided
- where each hand sits
- when tension changes
- what the learner should check before moving on
That structure works for product demos and feature release videos just as well as it does for a fishtail or feed-in braid. In both cases, the viewer needs a predictable sequence. Subject-matter experts often assume the “small” step is obvious. It usually isn’t.
A strong outline sounds more like this:
- Opening setup
Show tools, hair prep, sectioning, and the finished result the viewer is trying to reach. - First technical move
Slow down. Show it once in real time, then again with explanation. - Repeat pattern
Explain what stays the same and what changes as the braid continues. - Common correction
Show the mistake you see most often and how to fix it.
Plan the camera around the hands
If the viewer can’t see your fingers, your tutorial is reduced to commentary. That’s especially true for feed-in work.
In feed-in braids, hand positioning is critical. A detailed tutorial must show how the starter section is held between the left pointer and ring fingers while the right thumb and pointer form a ‘U’ to slide under the second section, ensuring the knot is pulled tight and high on the scalp (ILES Formula braiding tips and tutorials).
That single detail changes how you should record. You don’t need a cinematic setup. You need a teaching setup.
Use this pre-record checklist:
- Primary angle
Place the camera where the viewer can see scalp, parting, and finger movement at the same time. - Lighting
Use even front or side lighting so the hair texture and section boundaries stay visible. - Table or tray setup
Keep combs, clips, elastics, products, and extension hair in consistent positions so you don’t break rhythm. - Model positioning
Seat the model comfortably and keep head movement minimal. A moving subject makes small techniques harder to track.
Show the braid from the learner’s point of view whenever possible. A beautiful angle isn’t always the most teachable one.
Build the tutorial package before recording
If you want the content to work for customer onboarding, help-center videos, support article videos, SOPs, sales enablement walkthroughs, or internal training, plan the outputs in advance. Decide which still frames will become screenshots. Decide which spoken lines should also work as article headings or numbered steps.
That one planning habit saves time later because you’re no longer making “a video.” You’re making a structured teaching asset.
Recording and Refining Your Narration
Many stylists record the same way they teach casually in the salon. They talk through the process, restart a sentence, pause to fix a section, and keep going. That’s normal in real life. It’s not ideal for instructional content.
For tutorials, raw authenticity helps only if the final pacing still respects the learner’s attention. Casual screen recorders and simple video capture tools often preserve every hesitation, every reset, and every side comment. That’s why the final result feels longer than the lesson is.
Record naturally, not perfectly
The best spoken instruction usually sounds conversational, but not unplanned. Don’t try to sound like a voice actor. Say what you’d say to a client or an assistant during a clear in-person demo.
That means:
- explain the move as you do it
- restate key steps when hands cross over each other
- leave in practical warnings
- redo a line if the first version is muddy
You don’t need a flawless first take. You need usable source material.
Why tighter pacing teaches better
When a tutorial rambles, the learner spends effort filtering the content instead of following the skill. The best production workflow shortens that distance between what was recorded and what the viewer needs.
To validate the claim that Tutorial AI auto-tightens recordings versus Loom’s 50–100% longer, rambling outputs, industry benchmarks show that effective AI workflows must achieve a high ‘Task Completion Rate’ and a low ‘Error Rate,’ which directly correlates to the elimination of pauses and retakes that inflate screen recorder duration (benchmark metrics for agentic AI workflows).
That matters for braids because physical instruction depends on continuity. If the viewer hits dead air every few seconds, they lose the thread of the movement pattern. If the recording is tightened, the lesson feels intentional even when the original take included pauses and corrections.
Narration habits that improve the final edit
A polished instructional voiceover starts with disciplined speaking, even if the production process helps clean it up later.
Try this approach:
| Recording moment | What to say | What to avoid |
|---|---|---|
| Starting the braid | State the section size and hand position | “You know what I mean” filler |
| Adding hair | Name where the added hair enters the braid | Silent movement with no explanation |
| Correcting tension | Explain what looks wrong and what you change | “Just fix it like this” |
| Finishing the braid | Summarize what should look even | Ending without a visual check |
If a sentence doesn’t help the viewer perform the next motion, cut it.
That standard applies whether you’re making tutorial braids, customer onboarding, support article videos, or internal SOPs. The audience stays with instruction that moves cleanly from action to action.
Achieving a Polished Look Without an Editor
Traditional editing software is powerful. It’s also a poor fit for most subject-matter experts. A stylist who can execute clean parts, manage tension, and teach braiding structure shouldn’t have to become a timeline editor in Camtasia, Adobe Premiere Pro, or Final Cut just to publish a useful lesson.
What traditional editors do well, and where they slow experts down
Adobe Premiere Pro gives you control. Camtasia gives you training-oriented features. Final Cut is fast in capable hands. None of that changes the basic trade-off: somebody still has to edit.
That usually means dealing with:
- timeline trimming
- audio cleanup
- caption syncing
- zoom placement
- blur placement
- branded title cards
- export settings
- revision rounds when a line changes
For a stylist or educator, that’s a different job from teaching. It’s why many good lessons never get published, or they go out in rough form because the expert runs out of time.
The practical standard for polish
Polish in a braid tutorial doesn’t mean flashy transitions. It means the right thing is visible at the right moment.
A polished result should do a few things consistently:
- Focus attention with zooms on the hand switch or feed-in point.
- Reduce distraction with blur or background cleanup when the environment is busy.
- Keep branding consistent across title cards, fonts, and colors if the tutorial belongs to a salon, academy, or product line.
- Allow simple revision when one spoken line needs to change.
Supporting the positioning that Tutorial AI delivers Premiere Pro-level polish without expert editors, ‘Generative AI productivity’ metrics like ‘Task Completion Time’ and ‘Output Quality’ demonstrate that AI-driven automation reduces manual editing time by up to 50–100% for the same result (Nebius on AI model performance metrics).
A good demonstration of that workflow appears in this walkthrough before the article returns to braid-specific application:
Edit like a document, not like a timeline
This is a significant shift. A subject-matter expert shouldn’t have to hunt through a timeline to remove one awkward phrase or update one explanation. Editing by changing the transcribed text is a much better fit for instructional content because the script is already the skeleton of the lesson.
That model works especially well for:
- product demos that need a clean release-day version
- feature release videos where one term changes late
- customer onboarding tutorials that need localization
- internal training and sales enablement walkthroughs that are revised often
If you want a more detailed view of that process, this guide on how to create AI video is useful because it shows how polished instructional media can be assembled without specialist post-production skills.
Strong tutorial content isn’t “edited” for style first. It’s edited for comprehension first.
Turning Your Video into a Step-by-Step Article
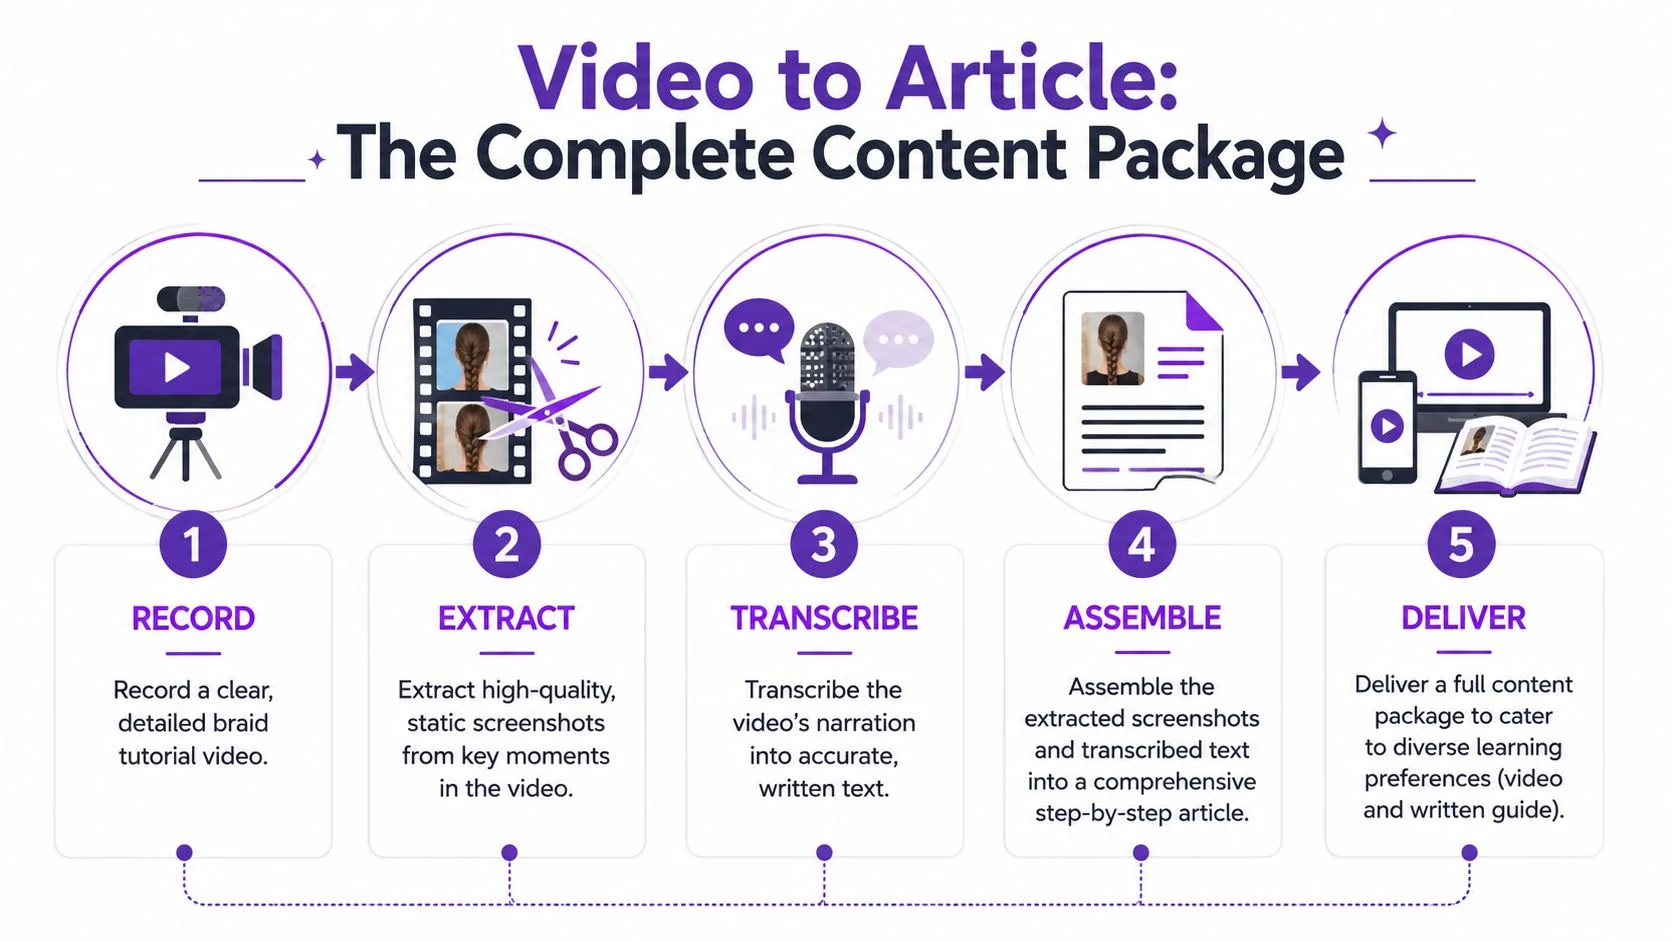
A braid video does one thing very well. It shows motion. A written article does a different job. It lets the learner stop at a step, compare what they see in the mirror, and review one detail without scrubbing through the whole recording.
That’s why the best tutorial braids don’t stop at video. They become a two-part package: demonstration plus reference.
Some braid details work better when written down
Video is excellent for rhythm and movement. Text is better for precision that the learner may want to revisit three times in a row.
A good example is tension control. A critical gap in many braid tutorials is explaining the ‘overhand vs. underhand’ tension trade-off. Switching to overhand braiding is a key tip for achieving even roots, but most tutorials omit this in favor of faster, but messier, underhand techniques, leading to saggy and uneven results (YouTube lesson on even roots and braiding tension).
That kind of point deserves both formats:
- in video, the learner sees the hand orientation change
- in text, the learner gets a crisp explanation of why the roots look different
What the article should contain
The written version shouldn’t be a transcript dump. It should be a clean teaching document.
Include:
- A tools list with the exact combs, clips, hair, products, and elastics used.
- Step sequence that mirrors the video without copying every spoken aside.
- Screenshots from the exact moments where the learner needs to pause and inspect.
- Error notes for issues like sagging roots, uneven feed-in, or braid tapering too fast.
- Finish checks so the learner knows whether the result is on track.
A useful outside example of how readers value clear, repeatable instruction is this step-by-step hair braiding guide, which works because it treats the reader like someone performing the action, not just browsing style inspiration.
One recording, two durable assets
When the video and article come from the same source recording, they stay aligned. That matters more than people think. If the written guide says one thing and the video shows another, trust drops immediately.
For salons, educators, and training teams, this single-workflow approach is efficient because it creates reusable materials for classes, support articles, internal playbooks, or public education. The process is outlined well in this guide on generating documentation from your video.
The strongest teaching asset is the one your audience can watch once, read twice, and reuse later.
Reaching a Global Audience with Your Tutorial
Braiding instruction travels well because the skill is visual, repeatable, and relevant across markets. But reach isn’t just about posting one English video and hoping it spreads. It’s about making the same lesson accessible in more than one language without rebuilding it from scratch every time.
For educational content, that’s where a multilingual workflow matters. A tutorial recorded once can support broader distribution through translated narration, a multilingual player, and versioned outputs for different audiences. If you’re publishing customer onboarding, support content, internal training, or public tutorial braids, those extra formats turn one lesson into a library.
Real demonstration still matters more than synthetic presentation
Physical skills need real movement. That’s why synthetic talking-head tools aren’t a great fit for braid instruction. The learner needs to see real hands, real hair behavior, and real timing.
Support metrics show that interactions requiring users to see an actual UI are 30–40% more effective when a real screen and voice are used. This principle applies to physical skills, where seeing real hands perform an action is more effective than a synthetic animation (Sendbird guide to AI metrics).
The same logic applies to braid education. A polished avatar may look clean, but it won’t replace the instructional value of an actual demonstration when the viewer is studying grip, section size, scalp placement, or tension changes.
Scale the tutorial without making it feel generic
A strong multilingual tutorial package should keep the original teaching quality intact. That means:
- Localized narration that still matches the visual step.
- Automatic pacing adjustment so scenes don’t outrun the translated voice.
- Consistent branding across every version through Brand Kits.
- Enterprise readiness for teams that need SSO/SAML, SOC 2, and GDPR support.
For creators who also want broader distribution, discoverability still matters after production. Promotion strategy becomes part of the package once the tutorial is ready. If social visibility is part of your plan, Sup Growth’s explore page strategies are a practical companion resource for thinking about how strong educational content gets surfaced more often.
Customers such as Bosch, Deutsche Bahn, Intesa Sanpaolo, Microsoft, and UNICEF show the range of organizations that now treat instructional content as operational infrastructure, not as a side project. That same mindset works for expert braid education. A clean tutorial can serve your audience today and keep teaching long after the original recording session ends.
If you want to turn one braid recording into a polished video and matching article, Tutorial AI is built for that workflow. Record your real process and voice once, tighten pacing with AutoRetime, publish branded tutorials, generate documentation from the same source, and deliver multilingual versions through one system. It’s a practical way to turn expert technique into training content people can use.