You’re probably here because you need a clean tutorial recording today, not a weekend hobby project. Maybe it’s a product demo for a release, an onboarding walkthrough for new customers, an internal SOP, or a help-center video that has to show the actual UI clearly. OBS can absolutely do that. The problem is that most Open Broadcaster tutorials are built around streaming, gaming overlays, and creator setups that don’t map well to business tutorials.
That’s why this guide stays focused on professional screen recordings. The goal isn’t flashy production. It’s a sharp capture, stable audio, and a scene setup that gives you a file you can use for product demos, feature release videos, customer onboarding, help-center and knowledge-base videos, support article videos, internal training, SOPs, and sales enablement walkthroughs.
Why OBS is the Gold Standard for Screen Recording
OBS feels intimidating the first time you open it because it exposes real production controls. That’s also why it lasts. Once you understand scenes, sources, and output settings, you stop fighting the tool and start getting predictable results.
OBS is also the tool users often learn anyway. By 2023, OBS Studio had surpassed 12 million active monthly users, with monthly downloads across all platforms exceeding 3 million, making it the de facto standard for live-streaming and screen-capture education globally, according to Swarmify’s overview of OBS usage. If you’re investing time in one recording tool, OBS is a practical choice because the skills transfer almost everywhere.
Why OBS works for tutorials, not just streams
A lot of beginners assume OBS is only for Twitch setups. It isn’t. For tutorial work, its strengths are different:
- Scene control: You can create separate layouts for intro slides, your main demo, and closing screens.
- Source control: Window Capture, Display Capture, webcam, text, logos, and images all stay editable.
- Recording stability: OBS gives you more control than lightweight recorders that are fine for quick clips but weak for polished training content.
- Audio routing: You can manage mic and desktop audio separately, which matters when you’re narrating software steps.
If you’re comparing workflows before you commit, TimeSkip’s video tutorial guide is a useful companion piece because it looks at the broader process of making tutorial videos, not just which record button to press.
Where beginners usually get stuck
Most frustration comes from three things:
| Problem | What’s happening | Better approach |
|---|---|---|
| Blurry recordings | Canvas and output settings don’t match | Set resolution deliberately before recording |
| Messy layout | Too many sources added too early | Start with one clean scene |
| Rambling delivery | Recording begins before the structure is clear | Outline the demo in sections before opening OBS |
OBS rewards a calm setup. It punishes improvisation.
If you’re still weighing tools, this roundup of free screen capture software options gives useful context on where OBS fits compared with simpler recorders.
Practical rule: Don’t learn OBS by trying to build a “creator rig.” Learn it by recording one clean software tutorial from start to finish.
Installation and Your First Launch
Start with the official OBS download for your operating system. Install the version for Windows, macOS, or Linux, then launch it and let it complete the initial setup. The installation itself is straightforward. The part that matters is what you choose after that.
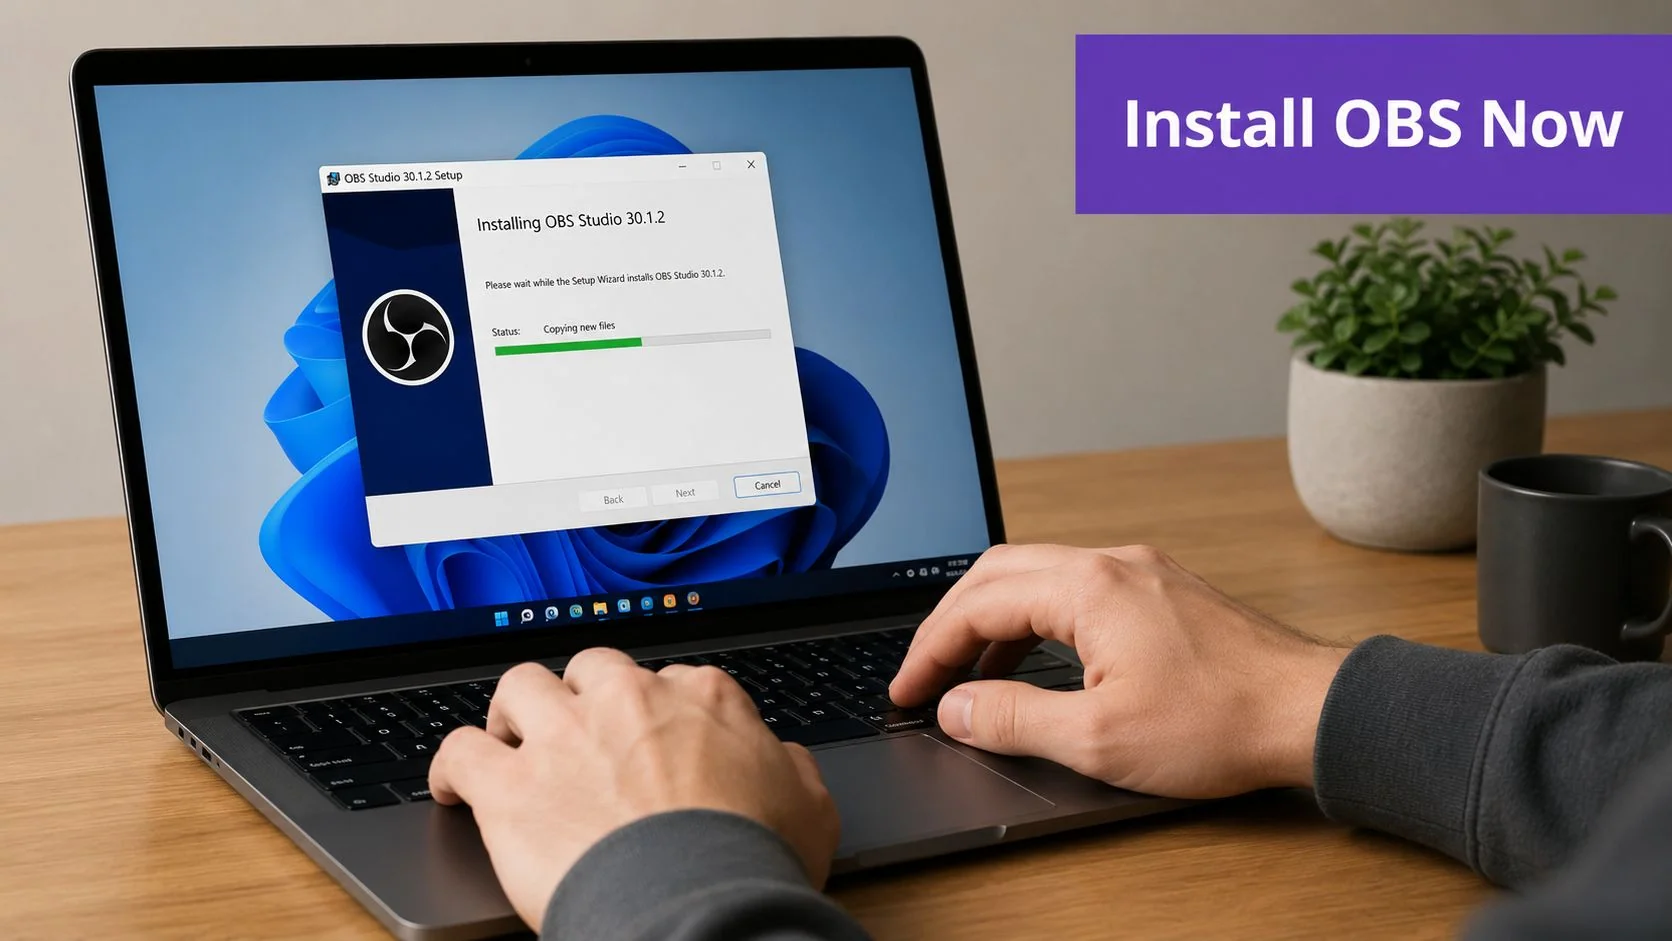
On first launch, OBS typically offers the Auto-Configuration Wizard. For tutorial recording, choose the option that prioritizes recording, not streaming. That gives OBS a better starting point for local capture, which is what you want for demos, onboarding videos, and training assets.
Pick recording over streaming
This choice matters because the wizard is trying to optimize for your main job. If you tell OBS you’re a streamer, it will lean toward live delivery decisions. If you tell it you’re recording, it will better match the workflow of screen tutorials.
Use this simple decision guide:
- Recording tutorials or demos
Choose recording optimization. - Streaming live events regularly
Choose streaming optimization. - Doing both, but tutorials matter more
Still choose recording. You can create a separate profile later.
That last point saves a lot of rework. New users often click through the wizard quickly, then wonder why the defaults feel odd for local capture.
Learn the five parts of the interface
Once OBS opens, you don’t need to understand everything. You need a working mental map.
- Scenes
These are your layouts. Think “Intro,” “Main Demo,” or “Outro.” - Sources
These are the building blocks inside a scene, such as Display Capture, Window Capture, webcam, text, or image overlays. - Audio Mixer
This shows your live mic and desktop audio levels. - Scene Transitions
This controls how OBS moves from one scene to another, such as a Fade. - Controls
You can start recording, stop recording, open settings, or use the auto-configuration tools again.
A quick visual walkthrough helps if you prefer to see the interface before clicking around:
What to check before you record anything
Before building a scene, make sure OBS can see the devices you care about.
| Check | What to confirm |
|---|---|
| Microphone | Your primary mic appears in the mixer and responds when you speak |
| Webcam | It’s available as a video device if you plan to use face cam |
| Screen permissions | macOS especially may require screen recording permission |
| File path | Your recording folder is somewhere easy to find |
If your mic meter moves but your recording sounds distant, that’s usually a microphone placement issue, not an OBS issue.
OBS can look busy on first launch, but the interface is logical once you think in layers. Scene first. Sources inside the scene. Audio checked before recording. Controls on the right when you’re ready.
Building Your First Recording Scene
A good first scene is boring in the best way. It captures the right screen, your audio is clear, and nothing distracts from the product or workflow you’re teaching. That’s enough for a strong tutorial.
The two source types that matter most at the start are Display Capture and Window Capture. Everything else is optional.
Choose the right capture type
Display Capture records your entire screen. It’s useful when you need to move across several apps, browser tabs, or system menus during one recording.
Window Capture records one application window. It’s usually the better choice for software tutorials because it keeps the frame cleaner and reduces the chance of showing notifications, side windows, or unrelated desktop clutter.
Here’s the trade-off:
| Source type | Best when | Watch out for |
|---|---|---|
| Display Capture | You’ll move across multiple windows or need the whole desktop | Accidental popups, distracting desktop items |
| Window Capture | You’re demonstrating one app or browser window | Some apps behave inconsistently depending on OS permissions |
For product demos and support walkthroughs, Window Capture is usually the safer starting point. If the app doesn’t render properly, switch to Display Capture and tidy your desktop before recording.
Build the scene in the right order
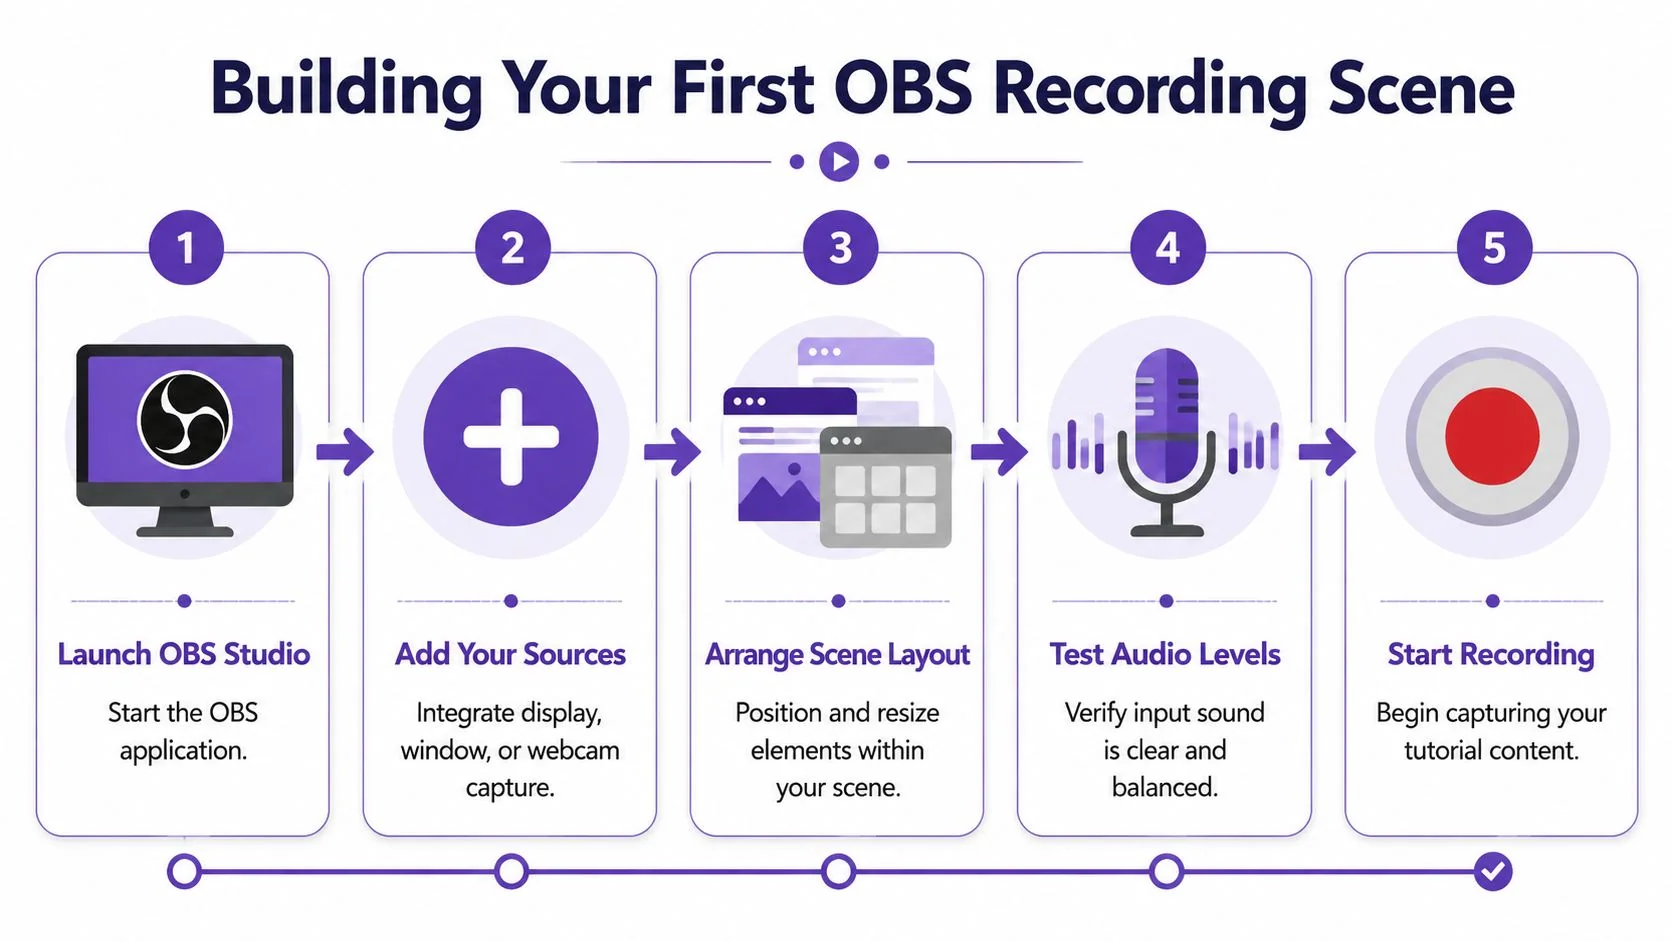
Create one scene and name it something useful, like Main Tutorial. Then add sources in this order:
- Your screen source first
Add Window Capture or Display Capture. This becomes your base layer. - Microphone check second
Speak naturally and watch the mixer. Don’t whisper into the mic during setup and then present louder during recording. - Webcam last, if needed
Add a Video Capture Device only if your face adds context. For many SOPs and support videos, screen-only is cleaner.
If you add a webcam, place it in a corner that doesn’t cover navigation, menus, or status messages. Bottom-right often works, but don’t follow that blindly. Put it where the software UI is least busy.
Understand source layering
OBS stacks sources like layers. Items higher in the source list appear above items below them. If your webcam disappears, it’s often sitting underneath the screen capture source.
That sounds simple, but it causes a lot of confusion on day one.
Keep your screen capture at the bottom of the source stack. Put webcam, text labels, and logos above it.
A clean basic scene often looks like this:
- Window Capture or Display Capture
- Video Capture Device for webcam
- Text for a title, if needed
- Image for a small logo, if your team requires branding
Don’t overbuild your first layout. Most tutorial recordings get worse when people add borders, animated overlays, and decorative elements before they’ve solved clarity.
When a webcam helps and when it doesn’t
Use a webcam when presence matters. That includes onboarding, sales enablement walkthroughs, and instructor-led training where viewers benefit from seeing the speaker.
Skip it when the software itself needs all the attention. Support videos, help-center clips, and tightly framed product demos often work better with no face cam at all.
If you want examples of what a tutorial-first workflow looks like beyond the OBS setup itself, this guide to screen recording for tutorials is useful because it focuses on instructional clarity rather than streamer aesthetics.
A first scene doesn’t need to impress anyone. It needs to stay readable, capture the right app, and let you narrate without technical surprises.
Using Advanced Scenes for a Polished Narrative
Single-scene recordings work, but they tend to drag. Even when the information is good, the presentation can feel flat because every moment looks the same. That’s where a multi-scene workflow helps.
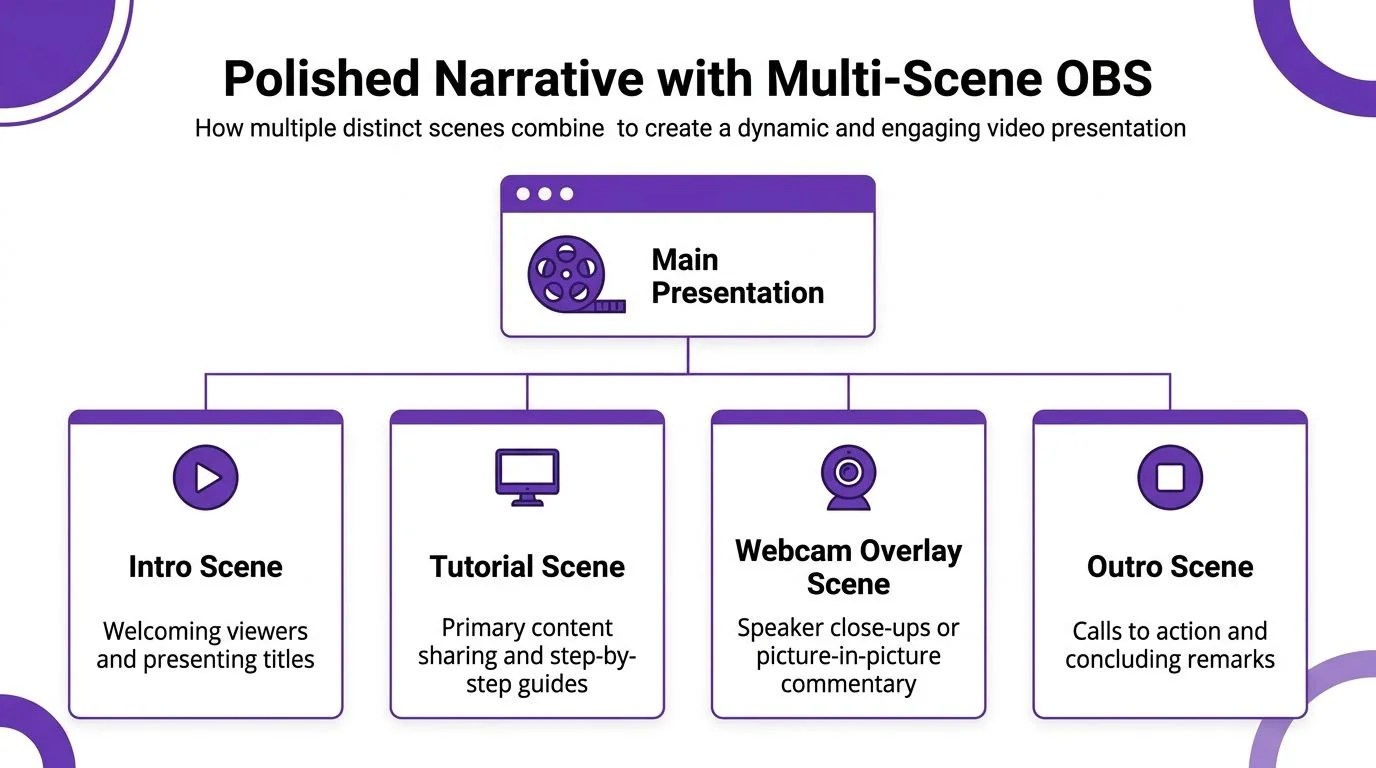
The most useful structure for tutorial work is simple: Intro, Main Content, and Outro. This mirrors how people process instruction. They need orientation, then the demonstration, then a clean finish.
Why multiple scenes improve tutorials
There’s a measurable upside to this approach. Data from streaming education platforms indicates that tutorials using multi-scene workflows with deliberate transitions achieve 20 to 25 percent higher viewer retention and comprehension compared to single-scene recordings, according to the OBS forum tutorial reference.
That result makes sense in practice. Scene changes create boundaries. Boundaries help viewers understand when a segment starts, when a step changes, and when the lesson is wrapping up.
A reliable three-scene structure
You don’t need a broadcast control room. You need a small system you can repeat.
Intro scene
Use a text title, optional logo, and a short spoken setup to tell viewers what they’re about to learn. Keep it visually clean.
Good use cases:
- Product demo title card
- “What you’ll learn” opening
- Feature release announcement screen
Main content scene
This is your actual screen recording layout. It usually contains the app window or full screen, plus optional webcam and mic narration.
For most business tutorials, this scene does almost all the work.
Outro scene
Use this for a short summary, next step, or pointer to related documentation. It gives the recording a finish instead of an abrupt stop.
This matters more than people think. A hard cut after the last click often makes a tutorial feel unfinished.
Add transitions with restraint
OBS lets you switch scenes live with transitions such as Fade. For tutorials, Fade is usually enough. You want the transition to separate sections, not steal attention.
A practical setup looks like this:
| Scene | Core sources | Best use |
|---|---|---|
| Intro | Text, logo, background image or color | Opening context |
| Main Content | Screen capture, mic, optional webcam | Step-by-step demo |
| Outro | Text, logo, final instruction | Wrap-up and next action |
You can switch scenes manually while recording. That’s often faster than trying to fake structure later in an editor.
A tutorial doesn’t need constant motion. It needs clear moments where one idea ends and the next begins.
Build scenes like modules
The best habit is to treat scenes as reusable modules. Create one intro scene template, one main demo scene, and one outro scene. Then duplicate and adjust them for each new recording.
That approach works especially well for teams producing:
- customer onboarding videos
- internal training libraries
- support article videos
- sales enablement walkthroughs
It also reduces mistakes. When your layout is standardized, you spend less time nudging text boxes and more time checking whether the tutorial itself is clear.
One caution. Don’t solve every presentation problem with more scenes. If you create a separate scene for every tiny action, recording gets awkward and switching becomes distracting. Use scenes for meaningful shifts, not for every click.
Optimal Settings for High-Quality Recordings
Most OBS quality problems come from a handful of settings. The good news is that you don’t need to master every menu. You need a recording profile that’s stable, readable, and repeatable.
For tutorial work, prioritize text clarity, smooth cursor movement, and audio consistency. Gaming advice often overemphasizes live streaming constraints. Local tutorial recording is a different job.
Start with the Video tab
The first setting to fix is resolution. If your Base (Canvas) Resolution and Output (Scaled) Resolution don’t match, you can introduce softness or scaling artifacts. That’s one of the most common reasons tutorial footage looks blurry.
For a straightforward workflow, set both values to the same resolution unless you intentionally need a smaller export.
A strong default setup for software tutorials is:
| Setting | Recommendation |
|---|---|
| Base Canvas Resolution | Match your intended recording resolution |
| Output Scaled Resolution | Match the canvas for maximum clarity |
| Common FPS Values | 60 if your workflow includes motion-heavy UI, otherwise choose the rate that matches your delivery needs |
If your text still looks soft after matching resolutions, check your operating system scaling and the size of the app window you’re capturing. Tiny UI recorded full-screen is still tiny UI.
Use recording settings that hold up in editing
For local captures, file safety and predictable quality matter more than trying to save every possible megabyte.
For high-performance 1080p60 recordings, experts recommend using the x264 encoder with a Constant Bitrate (CBR) of 16 to 20 Mbps into an MKV file, as these settings balance quality and file size without overly taxing modern CPUs, based on Wowza’s OBS guidance.
That gives you a practical baseline:
- Recording format: MKV
- Encoder: x264
- Rate control: CBR
- Bitrate: 16 to 20 Mbps for 1080p60
- Preset: Start with a faster preset if your machine struggles
MKV is a smart choice because it’s more forgiving if OBS or your system crashes during capture. If you need MP4 later, remux after recording instead of risking the original session.
A tutorial-first settings table
Here’s a compact setup that works well for demos, onboarding, and training recordings:
| OBS tab | Setting | Practical choice |
|---|---|---|
| Video | Base Resolution | Match your working resolution |
| Video | Output Resolution | Same as base unless scaling down intentionally |
| Output | Type | Standard recording |
| Output | Format | MKV |
| Output | Encoder | x264 |
| Output | Rate Control | CBR |
| Output | Bitrate | 16 to 20 Mbps for 1080p60 |
| Audio | Sample rate and devices | Use your primary mic consistently |
Don’t ignore audio cleanup
A sharp picture with muddy audio still feels amateur. For tutorial recording, viewers will tolerate a plain visual style long before they tolerate hum, hiss, or fluctuating mic volume.
Use one primary microphone and keep its position fixed. Then apply a light Noise Suppression filter only if you need it. Heavy processing can make speech sound brittle.
A simple audio checklist works well:
- Record in a quieter room
Software can reduce noise, but it can’t make a bad room sound natural. - Watch the mixer while speaking normally
Don’t set levels based on your “test voice.” - Run a short sample recording
Listen back before doing the full take.
Good OBS settings won’t rescue a bad mic position. Put the microphone closer to your mouth before you start changing filters.
Test before the real take
Record a short trial clip. Open it and check three things: text sharpness, cursor smoothness, and whether your voice stays clean through the full sample.
That quick test catches more problems than endless menu tweaking. OBS rewards verification, not guesswork.
From Raw Capture to Polished Asset with Tutorial AI
A clean OBS recording is a strong starting point. It still isn’t a finished tutorial.
Raw captures usually include pauses, repeated phrases, wrong turns, app loading delays, and little bits of spoken thinking that made sense while recording but don’t help the viewer. That’s one reason casual screen recorders create such long videos. In practice, those recordings often run 50 to 100 percent longer than needed because the speaker is working things out in real time and leaving every pause in place.
That’s the handoff point after OBS. You either edit manually, or you use a workflow that tightens the recording without turning it into a synthetic-looking explainer.
Why editing is the bottleneck
Traditional editors like Adobe Premiere Pro, Final Cut, and Camtasia are capable tools. They’re also much better suited to people who edit regularly. Subject-matter experts usually know the product, the process, and the customer problem. They usually aren’t trying to become timeline editors too.
That mismatch shows up most in enterprise tutorial work. Most OBS tutorials focus on gaming, but recent industry reports show a growing need for tutorials in enterprise contexts like internal training and customer support, where clarity and instructional design matter more than entertainment-focused features, as noted in this discussion of the gap in typical OBS guidance.
What a modern workflow looks like
A practical workflow now looks like this:
- Capture in OBS because it gives you solid control over scenes, audio, and output quality.
- Polish after recording with a system that can tighten pacing and keep attention on the important parts of the UI.
- Publish both video and documentation from the same source material when the audience needs more than a clip.
Teams often look at tools built for tutorial production rather than general editing. If you’re exploring the available options, AI tools for faster video creation is a useful overview of how newer editing workflows differ from traditional timeline-heavy approaches.
Where Tutorial AI fits
Tutorial AI is built for a very specific job. It turns a single screen recording and spoken narration into a polished tutorial video that looks edited in Adobe Premiere Pro. It also generates a matching written article from the same recording, so teams ship a video and a help article in one workflow.
That’s a better fit for many teams than either extreme:
| Option | Strength | Limitation |
|---|---|---|
| Loom and casual screen recorders | Fast to capture | Recordings often stay too long and too loose |
| Adobe Premiere Pro, Final Cut, Camtasia | Deep editing control | Require editing skill and more production time |
| Synthesia, HeyGen, Vyond | Useful for synthetic presenter formats | Not ideal when viewers need the real UI and real voice |
| Tutorial AI | Real screen, real narration, automated polish | Still depends on a good source recording |
For tutorial-heavy teams, the practical value is in the workflow details. Tutorial AI can auto-tighten narration, apply Brand Kits, generate a document from the same recording, support a Multilingual Player, and fit enterprise environments with SSO/SAML plus SOC 2 and GDPR positioning. It also supports narration in 74 languages. Bosch, Deutsche Bahn, Intesa Sanpaolo, Microsoft, and UNICEF are among the organizations named as customers.
One important nuance matters here. There isn’t a neutral external benchmark that verifies the exact mechanics or output scale of automatic per-language re-timing workflows. So it’s smarter to evaluate multilingual automation qualitatively and in your own environment rather than expecting an independent industry metric to settle that question for you.
If you’re exploring simpler ways to clean up recordings without becoming a full-time editor, this guide to easy video editing software is a helpful next step.
If you already have OBS set up, the next move is simple: record one clean demo, then see how far you can take it with Tutorial AI. It’s a practical way to turn a raw screen capture into a polished tutorial and matching help article without building an Adobe Premiere Pro workflow from scratch.